A lovely lady, Anita, has redone her bedroom and graciously agreed to allow me to feature it here. She and her husband actually did the work themselves, including the total stripping , staining and polying her new furniture.. I asked her to do her own write up on this as I cant tell it to you nearly as well so here it is in her own words...
***************************************
Thank you to all these lovely ladies for hosting parties for us..
I’m linking to::
:::: some parties do not begin until after 9 pm on Sunday evening::::
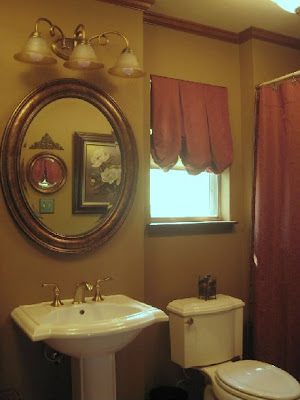
My husband and I just spent the last six months as home renovation weekend warriors, and this is the result! Our 1970s master bath was still wearing its 1980s décor and it was overdue for a change! The bedroom, on the other hand, has been through too many incarnations to count because I’ve had a hard time getting it just right.
While hubby tackled the bathroom demo, I searched craigs list for new bedroom furniture. The number one criteria was that it had to be solid wood (no particle board), and that was a surprisingly hard criteria to meet. After months of searching, I finally found a high quality Lexington Furniture set which I loved all but the whitewashed finish. Through pure luck, I found a matching king headboard in the finish I wanted, so I decided the set was meant to be. I bravely decided I could refinish it. Well, I could, and I did, but it took four months! Stripping the old finish was by far the most time consuming part. I used Citrastrip and a lot of elbow grease. I mixed my own stain color, using three different colors of gel stain, and gave it four coats of that. Next came four coats of satin polyurethane, starting with brush-on and finishing with wipe-on for a smooth finish. It looks pretty good if you don’t examine it with a flashlight and magnifying glass!
I found the armoire, chair, rug, and lamps (solid brass Stiffels) on craigs list, too, and all the art on eBay. The only things I purchased new were the bedding, drapes, and mirrors (and a few little accessories). I used ORB spray paint on baskets and picture frames that I already owned to tie them all together.
As I plugged away on stripping furniture, hubby got busy on construction. After we both spent a weekend stripping wallpaper, he removed the shelves and furdown from the wall behind the bed (which I had installed myself years before incidentally), and totally gutted the bathroom down to the studs, except for the tub and tile surround. He reconfigured the back wall of the bath (bringing it in to cover plumbing issues behind the sink) and relocated the linen closet from the back wall to the side wall opposite the tub, building the new cabinets completely from scratch. He also removed the popcorn from the bathroom ceiling and installed crown molding to both rooms. I painted the bath and dressing area with Sherwin Williams “Portabello” and the bedroom with SW “Nomadic Desert.” Although we did most of the work ourselves, we hired a few things done along the way.
All our hard work has paid off with a beautiful new master suite, and I’m so thrilled that Sonny asked to feature it in her blog! I hope you all enjoy looking at it!
*****************************************
Here are the before- during and after photos.... absolutely Amazing~!!!
I think you'll all agree all their hard word was well worth it to have made such a miraculous transformation.
I plan to send her the link so she'll be able to see all your comments. She surely deserves every bit of praise we can all give her. She certainly has my admiration.
Thanks so much for visiting and allowing me to show you Anita's bedroom redo...
Have a Happy Monday~!
Sonny


